How to Measure UV Energy Density in UV Curing Systems: A Comprehensive Guide
In the world of industrial manufacturing, UV curing has revolutionized the way we approach adhesives, coatings, inks, and sealants. By using high-intensity ultraviolet light to trigger a photochemical reaction, businesses can achieve instant drying and superior bonding. However, the success of this process hinges on one critical factor: precision. Understanding how to measure UV energy density in UV curing systems is not just a technical requirement—it is the foundation of quality control, process efficiency, and cost management.
If the UV energy is too low, the material may remain tacky or fail to adhere, leading to product recalls. If the energy is too high, you risk damaging the substrate, wasting electricity, and shortening the lifespan of your expensive UV lamps. This guide provides a deep dive into the methodology, tools, and best practices for measuring UV energy density to ensure your curing process is optimized for peak performance.
Understanding the Basics: UV Irradiance vs. UV Energy Density
Before diving into the measurement process, it is essential to distinguish between two frequently confused terms: Irradiance and Energy Density. Both are vital to the curing process, but they represent different physical properties of the light being emitted.
What is UV Irradiance?
UV Irradiance refers to the “intensity” of the UV light at a specific moment. It is the radiant power arriving at a surface per unit area. In the context of UV curing, think of irradiance as the “brightness” of the lamp. It is measured in Watts per square centimeter (W/cm²) or milliwatts per square centimeter (mW/cm²). Irradiance is responsible for penetrating the depth of the coating to ensure the bottom layers are cured.
What is UV Energy Density (Dose)?
UV Energy Density, often referred to as the “dose,” is the total amount of UV energy delivered to a surface over a specific period. It is the mathematical integral of irradiance over time. If irradiance is “how hard” the light is hitting the surface, energy density is “how much” total light has hit the surface during the entire exposure cycle. It is measured in Joules per square centimeter (J/cm²) or millijoules per square centimeter (mJ/cm²).
The relationship can be simplified with the formula: Energy Density = Irradiance x Time. Therefore, if you increase the conveyor speed in a UV curing system, you decrease the exposure time, which in turn decreases the total energy density, even if the lamp’s irradiance remains constant.
Why Measuring UV Energy Density is Critical for Industrial Processes
Why should a facility invest time and resources into regular measurement? The answer lies in the volatility of UV lamp output and the sensitivity of chemical formulations.
1. Ensuring Consistent Product Quality
UV-curable materials are engineered to react to a specific “energy window.” If the energy density falls below the manufacturer’s recommended threshold, the polymer chains do not fully cross-link. This results in “under-cure,” which can manifest as poor chemical resistance, low scratch resistance, or loss of adhesion. Conversely, “over-cure” caused by excessive energy can lead to brittleness, discoloration (yellowing), or shrinkage. Regular measurement ensures you stay within the optimal window.
2. Optimizing Energy Consumption and Lamp Life
UV lamps, whether they are traditional mercury vapor lamps or modern UV LEDs, degrade over time. Their output naturally declines as they age. Without measuring energy density, operators often compensate for aging lamps by slowing down production speeds or cranking up the power to 100% prematurely. By measuring the actual output, you can run your system at the most efficient power level and only replace lamps when they truly fail to meet the required dose.
3. Troubleshooting and Process Validation
When a production line fails, the first question asked is usually, “Is it the chemistry or the equipment?” Having a log of UV energy density measurements allows you to quickly rule out or identify the UV system as the source of the problem. Furthermore, many industries (such as medical device manufacturing or aerospace) require documented process validation to prove that every part was exposed to the correct amount of light.
Essential Tools for Measuring UV Energy
To measure energy density accurately, you need specialized equipment designed to withstand the high temperatures and intense radiation of a UV curing chamber. There are three primary tools used in the industry today.
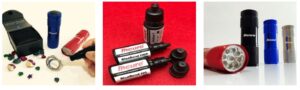
UV Radiometers (Puck-Style)
The “Puck-style” radiometer is the industry standard for conveyorized UV systems. These are self-contained, disc-shaped devices that are placed on the conveyor belt alongside the product. As the radiometer passes under the UV lamps, it records the irradiance and calculates the total energy density. High-end radiometers can measure multiple UV bands (UVA, UVB, UVC, and UVV) simultaneously, providing a complete spectral profile of the lamp.
UV Power Pucks and Multi-Band Sensors
Advanced versions of radiometers, such as the Power Puck, allow for data logging and graphical analysis. These tools are essential for systems using “doped” lamps (like Gallium or Iron additive lamps) because they can distinguish between the different wavelengths being emitted. This is crucial because different photoinitiators in the ink or coating respond to different wavelengths.
UV Test Strips (Dosimeters)
UV strips are color-changing labels that are sensitive to UV radiation. While they are less precise than electronic radiometers, they are excellent for quick “pass/fail” checks or for reaching tight spaces where a bulky radiometer cannot fit. The strip changes color based on the total dose received, which is then compared against a reference chart. However, for precise process control, an electronic radiometer is always preferred.
Step-by-Step Guide: How to Measure UV Energy Density
Measuring UV energy density is a straightforward process, but it must be done consistently to yield meaningful data. Follow these steps to ensure accuracy.
Step 1: Tool Preparation and Calibration Check
Before any measurement, ensure your UV radiometer is clean. Any dust, fingerprints, or resin on the sensor window will block UV light and result in an artificially low reading. Clean the sensor with a lint-free cloth and analytical-grade isopropyl alcohol. Additionally, check the calibration sticker. Most radiometers require professional calibration every 6 to 12 months to maintain accuracy.
Step 2: Setting the Measurement Parameters
If your radiometer has multiple modes, select the one that matches your process. For most applications, you will want to measure “Total Energy Density” (mJ/cm²) and “Peak Irradiance” (mW/cm²). If you are using an LED UV system, ensure your radiometer is specifically rated for LED measurement, as the spectral output of LEDs is much narrower than mercury lamps.
Step 3: Positioning the Radiometer
Place the radiometer on the conveyor belt. It is vital to place it in the same orientation and position every time—usually in the center of the belt. If your curing system is wide, you may want to run measurements on the left, center, and right sides to ensure the lamps are providing uniform coverage across the entire width of the conveyor.
Step 4: Running the Test Cycle
Initiate the conveyor and allow the radiometer to pass through the UV chamber at your standard production speed. It is important to measure under “real-world” conditions. Ensure the lamps have had sufficient time to warm up (usually 5-10 minutes for mercury lamps) before taking the measurement.
Step 5: Reading and Recording Data
Once the radiometer exits the chamber, retrieve it (carefully, as it may be hot) and record the readings. Most modern devices will display the peak irradiance and the total energy density for each UV band. Compare these numbers to your “Golden Standard”—the readings you took when the system was new and the process was working perfectly.
Factors That Influence UV Energy Density Readings
If your readings are not what you expected, several variables could be at play. Understanding these factors helps in troubleshooting the curing process.
- Conveyor Speed: This is the most common variable. Since energy density is time-dependent, doubling the conveyor speed will roughly halve the energy density.
- Lamp Aging: As mercury lamps age, they undergo “solarization,” where the quartz sleeve becomes cloudy, blocking UV output even if the lamp still looks bright to the human eye.
- Reflector Condition: The reflectors behind the UV lamps are responsible for directing up to 75% of the UV energy toward the product. If they are warped, dusty, or dull, your energy density will plummet.
- Distance from Lamp to Substrate: The “Inverse Square Law” applies here. Small changes in the distance between the lamp and the sensor can lead to significant changes in irradiance and energy density.
- Internal Temperature: Excessive heat inside the UV chamber can affect the efficiency of the lamps and, in some cases, the accuracy of the measurement electronics if they are not properly shielded.
Analyzing the Results: What the Numbers Mean
Simply having the numbers is not enough; you must know how to interpret them. A typical radiometer report will give you values for UVA, UVB, UVC, and UVV.
Understanding Spectral Bands
- UVA (315-400nm): Generally responsible for “through-cure” or deep penetration into the coating.
- UVB (280-315nm): Contributes to both surface and depth cure.
- UVC (200-280nm): Crucial for “surface cure” and tack-free finish. This is the first wavelength to be blocked by dust or aging quartz.
- UVV (400-450nm): Visible UV, often used for curing very thick coatings or through pigmented layers.
If your UVA is high but your UVC is low, you might find that your coating is cured at the bottom but remains sticky on top. This indicates that your lamps are aging or your reflectors need cleaning, as UVC is the most easily lost part of the spectrum.
Best Practices for UV Measurement and Maintenance
To maintain a world-class UV curing process, integrate these best practices into your standard operating procedures:
- Establish a Baseline: When your lamps are new and your reflectors are clean, take a measurement. This is your “Golden Standard.” All future measurements should be compared against this baseline.
- Measure Daily or Weekly: Depending on your production volume, measurements should be taken at the start of every shift or at least once a week.
- Keep a Logbook: Track your measurements over time. A slow, steady decline in energy density indicates normal lamp aging, while a sudden drop suggests a component failure (like a ballast or cooling fan).
- Train Your Staff: Ensure that operators know how to use the radiometer correctly. Improper placement or failing to clean the sensor can lead to false readings and unnecessary downtime.
- Use High-Quality Radiometers: Invest in a reputable brand of radiometer. Inaccurate data is often worse than no data at all, as it can lead to incorrect process adjustments.
Common Pitfalls in UV Energy Measurement
Even experienced technicians can make mistakes when measuring UV energy. Avoid these common pitfalls:
1. Ignoring the Spectral Response: Not all radiometers see the same light. A radiometer designed for mercury lamps will give inaccurate readings if used on a UV LED system. Always match the tool to the light source.
2. Failing to Account for Heat: UV lamps generate significant infrared heat. If a radiometer becomes too hot, its internal sensors may drift. Some systems require “heat shields” or specific cooling periods between runs.
3. Measuring Only One Point: On a wide conveyor, the energy density at the edges is often lower than in the center. Always perform a “cross-web” profile to ensure uniformity.
4. Over-reliance on Visual Inspection: You cannot see UV light. A lamp that looks bright blue/violet to your eyes might be emitting almost zero UVC energy. Always trust the radiometer over your eyes.
Conclusion
Measuring UV energy density is the most effective way to take the guesswork out of your UV curing process. By consistently monitoring the millijoules and milliwatts hitting your product, you ensure that your manufacturing line remains efficient, your products meet quality standards, and your operational costs are kept in check.
Whether you are curing automotive parts, printing high-speed labels, or assembling medical devices, the principles of UV measurement remain the same. Invest in the right tools, establish a rigorous measurement routine, and use the data to drive your maintenance decisions. In doing so, you will transform your UV curing system from a “black box” into a predictable, high-performance asset.
Visit www.blazeasia.com for more information.