How to Determine the Correct UV Dosage for UV Ink: A Comprehensive Guide
In the world of industrial printing and coating, UV curing technology has revolutionized production speeds and product durability. However, the transition from traditional solvent-based drying to UV curing comes with a steep learning curve. The most critical factor in achieving a successful cure is understanding and controlling UV dosage. If the dosage is too low, the ink remains tacky and fails to adhere; if it is too high, the substrate may warp, or the ink may become brittle and crack.
Determining the correct UV dosage for UV ink is not a “set it and forget it” process. It requires a combination of scientific measurement, understanding ink chemistry, and regular monitoring of equipment performance. This guide will walk you through everything you need to know to master UV dosage for your production line.
What is UV Dosage? Understanding the Basics
Before we dive into calculations, we must distinguish between two terms that are often confused: UV Intensity (Irradiance) and UV Dosage (Radiant Exposure).
UV Intensity (Irradiance)
Intensity refers to the “brightness” or power of the UV light hitting a surface at any given moment. It is measured in mW/cm² (milliwatts per square centimeter). Think of intensity like the temperature of an oven; it tells you how hot the fire is, but not how long the food has been cooking.
UV Dosage (Radiant Exposure)
Dosage is the total amount of UV energy delivered to a specific area over a period of time. It is measured in mJ/cm² (millijoules per square centimeter). The formula is simple: Intensity × Time = Dosage. In a conveyorized UV system, the “time” component is determined by the speed of the belt. Dosage is the most critical metric for ensuring that the chemical reaction (polymerization) within the UV ink is fully completed.
Why Correct UV Dosage is Critical for Quality Control
Achieving the “sweet spot” of UV dosage ensures that the ink performs as intended. Here is why precision matters:
- Adhesion: Proper dosage ensures that the ink bonds chemically with the substrate. Under-cured ink will peel or flake off easily.
- Chemical Resistance: Fully cured UV inks are highly resistant to solvents, oils, and cleaning agents. If the dosage is insufficient, the cross-linking of polymers is incomplete, leaving the ink vulnerable to chemical breakdown.
- Scratch and Abrasion Resistance: A complete cure creates a hard, durable surface. Inadequate dosage leads to a soft film that scratches under the slightest pressure.
- Color Consistency: Over-curing can cause “yellowing,” especially in clear coats or white inks. Conversely, under-curing can cause colors to appear dull or shift over time.
- Safety: Uncured UV monomers can be skin sensitizers. Ensuring a full cure is essential for the safety of end-users who handle the printed products.
Factors That Influence UV Dosage Requirements
Not all UV inks are created equal, and not all environments are the same. Several variables will dictate the dosage you need.
1. Ink Chemistry and Pigmentation
The color of the ink significantly impacts how UV light penetrates the film. Darker colors (like black and navy) and opaque colors (like white) absorb or reflect UV energy, making it harder for the light to reach the bottom of the ink layer. These “difficult” colors often require a higher UV dosage or a slower conveyor speed compared to clear coats or light yellows.
2. Ink Film Thickness
UV curing is a top-down process. The thicker the layer of ink, the more energy is required to ensure the light reaches the interface between the ink and the substrate. If the dosage is only sufficient for the surface, you may experience “surface cure” where the top is hard, but the bottom is liquid, leading to a total failure of adhesion.
3. Substrate Type
Porous substrates like paper or wood may absorb some of the ink, requiring more energy to cure the embedded particles. Non-porous substrates like plastics or metals reflect some UV energy back through the ink, which can actually assist the curing process but may also cause heat-related issues.
4. Lamp Type and Spectrum
Different UV lamps emit different wavelengths. Mercury vapor lamps (H-bulbs) are standard for most inks, but Gallium-doped or Iron-doped lamps may be required for thicker deposits or specific photoinitiators. LED UV systems have a very narrow spectral output (usually 365nm or 395nm) and require inks specifically formulated for those wavelengths.
Step-by-Step: How to Determine the Correct UV Dosage
To find the ideal dosage for your specific application, follow this systematic approach.
Step 1: Consult the Technical Data Sheet (TDS)
Every reputable ink manufacturer provides a Technical Data Sheet. This document usually lists a recommended “starting point” for UV dosage. For example, it might state: “Cures at 250-300 mJ/cm² using a medium-pressure mercury lamp.” While this is a helpful guide, it is based on laboratory conditions, so you must verify it on your own equipment.
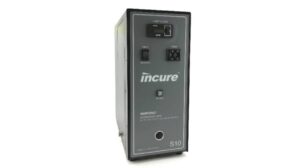
Step 2: Use a UV Radiometer
You cannot manage what you cannot measure. A UV radiometer (or dosimeter) is a device that you run through your UV tunnel. It records the peak intensity and the total dosage delivered.
- Place the radiometer on the conveyor belt alongside your substrate.
- Run it through at your standard production speed.
- Record the mJ/cm² reading.
This gives you your baseline. If the radiometer reads 150 mJ/cm² but your ink needs 250 mJ/cm², you know you need to either slow down the belt or increase the lamp power.
Step 3: Perform Physical Testing
Once you have achieved the manufacturer’s recommended dosage on your radiometer, you must verify that the ink is actually cured. Common field tests include:
- The Thumb Twist Test: Press your thumb firmly onto the cured ink and twist. If the ink smears or moves, it is under-cured.
- The Cross-Hatch Tape Test: Use a blade to score a grid into the ink, apply specialized adhesive tape, and pull it off quickly. If ink remains on the tape, adhesion is poor (likely due to under-curing at the substrate interface).
- The Solvent Rub Test: Soak a cotton swab in MEK (Methyl Ethyl Ketone) or Alcohol and rub the surface. Count how many rubs it takes to break through the ink. A fully cured ink should withstand a specific number of rubs (e.g., 50+ or 100+).
Step 4: Establish the “Curing Window”
Don’t just find the minimum dosage; find the range. Gradually increase the conveyor speed (decreasing dosage) until the ink fails the thumb twist test. Then, gradually decrease the speed (increasing dosage) until the substrate shows signs of heat damage or the ink becomes brittle. The space between these two points is your “process window.” Aim to operate in the middle of this window to allow for minor fluctuations in lamp output.
The Impact of Lamp Aging on UV Dosage
UV lamps do not last forever. A standard mercury vapor lamp typically has a lifespan of 1,000 to 1,500 hours. As the lamp ages, its intensity (mW/cm²) drops, which directly reduces the dosage (mJ/cm²) delivered at a constant belt speed.
To maintain the correct dosage over time, you must:
- Monitor Hours: Keep a log of how many hours each lamp has been in operation.
- Weekly Radiometry: Measure the dosage once a week. If you notice the mJ/cm² dropping, you may need to slow down your conveyor speed to compensate until the lamps can be replaced.
- Clean Reflectors: Often, a “low dosage” reading isn’t a bad bulb, but a dirty reflector. Dust and ink mist can coat reflectors, preventing UV light from being focused onto the substrate.
Advanced Considerations: Oxygen Inhibition
In many UV curing processes, especially with thin ink films or LED systems, “Oxygen Inhibition” can be a problem. Oxygen in the air can interfere with the chemical reaction at the very surface of the ink, leading to a “tacky” finish even if the rest of the ink is cured.
If you have measured the correct dosage but the surface is still slightly sticky, you may need to:
- Increase the UV Intensity (mW/cm²) to “overwhelm” the oxygen.
- Use a nitrogen blanket (inerting) to remove oxygen from the curing zone.
- Check if your ink is specifically formulated for LED curing, as these formulations often contain additives to combat oxygen inhibition.
Common Mistakes When Measuring UV Dosage
Even experienced operators can make mistakes when determining dosage. Avoid these pitfalls:
1. Relying on “Percentage” Power Settings
Setting your UV system to “75% power” means nothing in terms of dosage. 75% power on a new lamp is much stronger than 75% power on a lamp with 1,200 hours. Always measure the actual mJ/cm² output.
2. Ignoring the Wavelength
UV energy exists in different bands: UVA, UVB, UVC, and UVV. Some inks cure primarily with UVA, while others need UVC for surface hardness. Ensure your radiometer is measuring the specific wavelengths that your ink and lamp are designed for. If you use an LED lamp (395nm) but a radiometer designed for standard mercury lamps, your readings will be inaccurate.
3. Not Accounting for Heat
Higher dosage often comes with higher heat. If you are printing on thin plastic films, you might reach the required 300 mJ/cm² but melt the plastic in the process. In these cases, you may need to use “Cool UV” systems, such as LED or dichroic reflectors, which deliver UV energy without the infrared (heat) component.
Summary Checklist for Determining UV Dosage
- Check the ink manufacturer’s specs for the recommended mJ/cm² and mW/cm².
- Ensure your UV lamps and reflectors are clean and within their service life.
- Use a calibrated radiometer to measure the current dosage at your production speed.
- Adjust conveyor speed or lamp power until the radiometer matches the required dosage.
- Perform a “Thumb Twist” and “Tape Test” to verify the cure.
- Document the speed and power settings for that specific ink/substrate combination for future runs.
- Re-test periodically to account for lamp degradation.
Conclusion
Determining the correct UV dosage for UV ink is a blend of science and practical testing. By understanding the relationship between intensity and time, and by using the right measurement tools, you can ensure a high-quality, durable finish every time. Proper dosage control not only improves the quality of your printed products but also reduces waste, prevents customer returns, and extends the life of your equipment.
Whether you are working with high-speed offset printing, wide-format inkjet, or industrial coatings, the principles of UV dosage remain the same. Invest in a good radiometer, stay disciplined with your testing protocols, and always consult with your ink and equipment suppliers to optimize your process.
Visit www.blazeasia.com for more information.