How Engineers Prevent UV Curing Failures Every Day: A Comprehensive Guide to Industrial Process Control
In the high-stakes world of industrial manufacturing, UV curing has become a cornerstone technology. From the delicate assembly of medical devices to the high-speed coating of automotive components, ultraviolet (UV) curing offers speed, efficiency, and superior finish quality. However, the very speed that makes UV curing attractive also makes it unforgiving. A process that takes seconds to complete can also fail in seconds, leading to catastrophic production losses, compromised product integrity, and expensive recalls.
For process engineers, preventing UV curing failures is not a one-time setup task; it is a daily discipline rooted in physics, chemistry, and meticulous monitoring. Understanding how these professionals navigate the complexities of polymerization is essential for any facility looking to optimize its throughput. This guide explores the strategies, tools, and methodologies engineers use every day to ensure every millijoule of light translates into a perfect cure.
The High Cost of UV Curing Failures
Before diving into the “how,” it is important to understand the “why.” Why do engineers invest so much time into preventing failures? In industries like electronics or aerospace, a “failed” cure isn’t always obvious to the naked eye. A coating might look dry but lack the necessary cross-linking density to resist chemicals or mechanical stress. Common failure modes include:
- Surface Tackiness: Often caused by oxygen inhibition, leaving the product sticky and prone to contamination.
- Delamination: Poor adhesion to the substrate, causing the coating or adhesive to peel away over time.
- Under-curing: The material remains liquid or “gel-like” at the interface, leading to structural failure.
- Over-curing/Brittleness: Too much energy can degrade the polymer chains, making the material crack under stress.
- Bubbling and Outgassing: Rapid heat buildup or trapped volatiles can ruin the aesthetic and functional properties of the part.
Engineers prevent these issues by focusing on three pillars: Process Characterization, Equipment Maintenance, and Real-time Monitoring.
1. Defining the Process Window: The Foundation of Success
The first step an engineer takes to prevent failure happens long before the production line starts. It begins with defining the “Process Window.” This is the range of UV intensity and exposure time within which the chemistry will cure perfectly.
Irradiance vs. Energy Density (Dosage)
One of the most common mistakes in UV curing is confusing irradiance with dosage. Engineers distinguish between these two daily:
- Irradiance (mW/cm2): This is the “brightness” or power of the UV light hitting the surface. It is critical for initiating the reaction and overcoming oxygen inhibition at the surface.
- Energy Density or Dosage (mJ/cm2): This is the total amount of light energy delivered over time. If the conveyor speed is too fast, the dosage will be too low, even if the irradiance is high.
Engineers use lab testing to determine the minimum and maximum thresholds for both. They know that if the irradiance drops below a certain mW/cm2, the chemical reaction simply won’t start effectively, regardless of how long the part sits under the light. By establishing these boundaries, they create a “safety zone” that accounts for minor fluctuations in the production environment.
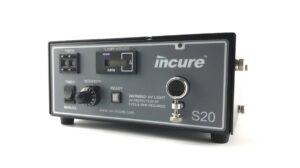
2. The Daily Use of Radiometry
If you ask a process engineer how they know their UV system is working, they won’t point to the “on” switch; they will point to their radiometer. UV light is invisible to the human eye, and the blue glow of a mercury lamp or an LED array is not an indicator of UV output. In fact, a lamp can glow brightly while emitting almost zero effective UV radiation due to aging or contamination.
Routine Measurement Protocols
Engineers prevent failures by implementing strict radiometry protocols. This usually involves:
- Start-of-Shift Verification: Running a radiometer through the UV tunnel or under the lamp to ensure the output matches the “Golden Standard” established during process characterization.
- Mapping the Cure Profile: Using multi-channel radiometers to measure different wavelengths (UVA, UVB, UVC, and UVV). Since different photoinitiators react to different wavelengths, a drop in just one band can lead to failure.
- In-line Sensors: In some high-volume environments, engineers install permanent sensors that provide real-time feedback on lamp intensity, triggering an alarm the moment the output dips below a set threshold.
3. Managing the Light Source: Mercury vs. LED
The type of UV source dictates the preventative measures an engineer must take. Currently, the industry is seeing a shift from traditional Mercury Vapor lamps to UV LED systems, but both require specific oversight.
Mercury Vapor Lamps
These lamps are notorious for degrading over time. As they age, the electrodes wear down, and the quartz envelope can “devitrify” or cloud over. Engineers prevent failure here by tracking lamp hours and monitoring the spectral shift. A mercury lamp doesn’t just get dimmer; its spectral output changes, meaning it might stop emitting the specific wavelength your adhesive needs while still appearing functional.
UV LED Systems
While LEDs have a much longer lifespan and don’t “warm up,” they are highly sensitive to temperature. If the cooling system (water or air) fails, the LED junctions will overheat, leading to a rapid and permanent drop in output. Engineers prevent LED failure by monitoring thermal management systems and ensuring the protective glass windows are free of dust and overspray.
4. The Role of Reflectors and Optics
In a traditional microwave-powered or arc-lamp system, the bulb is only half of the equation. The reflectors are responsible for directing up to 70% of the UV energy toward the part. Over time, reflectors can become warped, oxidized, or coated in “smoke” from the curing process.
Engineers prevent failures by inspecting reflectors weekly. A dull reflector can result in a “shadowed” area on a complex 3D part, leading to spots of uncured resin. By maintaining high-reflectivity surfaces (often using dichroic coatings), engineers ensure that the light reaches every nook and cranny of the substrate.
5. Chemistry Control and Material Handling
Sometimes the failure isn’t in the light, but in the material itself. UV-curable resins are sensitive chemicals. Engineers must manage the “input” side of the equation to ensure consistency.
Viscosity and Temperature
The viscosity of UV adhesives and coatings changes with temperature. If the factory floor is cold in the morning and hot in the afternoon, the thickness of the applied coating will vary. A thicker coating requires more energy to cure through to the bottom. Engineers prevent this by using heated dispensing systems or climate-controlled cleanrooms to keep the material properties constant.
Shelf Life and Pot Life
UV resins can begin to polymerize if exposed to ambient warehouse lighting or even certain types of fluorescent office lights. Engineers ensure that all materials are stored in UV-opaque containers and that “first-in, first-out” (FIFO) inventory practices are strictly followed to prevent using expired chemistry that may no longer react predictably.
6. Overcoming Oxygen Inhibition
One of the most persistent “invisible” failures in UV curing is oxygen inhibition. Oxygen molecules in the air can interfere with the free-radical polymerization process at the very surface of the coating. This results in a “tacky” finish, even if the material underneath is rock hard.
To prevent this, engineers employ several tactics:
- Nitrogen Inerting: Replacing the air in the curing chamber with nitrogen to eliminate oxygen. Engineers monitor nitrogen purity levels daily, as even a small amount of oxygen leakage can ruin a production run.
- Increased UVC Intensity: UVC (short-wave UV) is particularly effective at overcoming oxygen inhibition. Engineers ensure their lamp setups include sufficient UVC output for surface cure.
- Chemical Additives: Working with formulators to include waxes or oxygen scavengers in the resin that migrate to the surface to create a physical barrier against air.
7. Substrate Preparation and Surface Energy
A UV cure can be chemically perfect but still fail if it doesn’t stick to the part. This is an adhesion failure. Engineers prevent this by focusing on the substrate.
Many plastics have low surface energy, meaning the UV resin will “bead up” rather than wetting out. Engineers use daily “dyne level” testing to measure surface energy. If the energy is too low, they may implement pre-treatment steps such as:
- Corona Treatment: Using a high-voltage discharge to oxidize the surface.
- Plasma Treatment: Using ionized gas to clean and activate the surface at a molecular level.
- Flame Treatment: Briefly exposing the part to a flame to increase its receptivity to coatings.
By ensuring the substrate is ready before it ever reaches the UV station, engineers eliminate one of the most common variables for failure.
8. Troubleshooting: The Engineer’s Daily Checklist
When a failure does occur, engineers use a systematic approach to identify the root cause. They don’t guess; they isolate variables. A typical daily troubleshooting checklist might look like this:
Step 1: Verify the Light Output
Is the radiometer reading within the 5% tolerance of the baseline? If not, check the bulbs, reflectors, and power supply settings.
Step 2: Check the Chemistry
Is the batch number correct? Has the material reached its expiration date? Was it mixed properly if it contains pigments or fillers?
Step 3: Inspect the Application
Is the coating thickness (mil thickness) consistent? Use a wet-film gauge to verify. If the coating is too thick, the UV light may not reach the bottom.
Step 4: Analyze the Environment
Is the humidity unusually high? High humidity can cause moisture to blush on the surface, interfering with the cure or causing “cloudy” finishes.
Step 5: Test Adhesion
Perform a “cross-hatch” tape test. If the coating comes off, the issue is likely surface contamination or a mismatch between the resin and the substrate.
9. The Future of Failure Prevention: Industry 4.0
Modern engineers are increasingly moving away from manual checks toward automated, data-driven prevention. The integration of the Internet of Things (IoT) into UV curing systems allows for “Predictive Maintenance.”
Instead of waiting for a lamp to fail, smart systems monitor the current draw and spectral output in real-time. Algorithms can predict exactly when a lamp will fall out of the process window, allowing engineers to schedule maintenance during planned downtime. This “zero-downtime” approach is the ultimate goal of any UV curing operation.
Furthermore, digital twin technology allows engineers to simulate the UV curing process in a virtual environment. By modeling the 3D geometry of a part and the ray-tracing of the UV lamps, they can identify potential “dead zones” where the light won’t reach before the first physical part is ever produced.
Conclusion: The Discipline of Consistency
Preventing UV curing failures is not about a single “magic” tool; it is about the disciplined application of science and monitoring. Engineers prevent failures every day by respecting the complexity of the process. They treat UV light as a measurable, controllable industrial tool rather than a “set-and-forget” light bulb.
By focusing on accurate radiometry, rigorous equipment maintenance, substrate preparation, and environmental control, these professionals ensure that UV curing remains the fast, reliable, and high-quality solution it is meant to be. In the world of manufacturing, where margins are thin and quality is everything, the engineer’s role in managing the UV process is the difference between a successful product launch and a costly production nightmare.
Whether you are working with a simple conveyorized system or a complex robotic UV cell, the principles remain the same: Measure what is measurable, control what is controllable, and never assume the light is doing its job just because it’s turned on.
Visit www.blazeasia.com for more information.