A Practical Guide to Measuring UV Irradiance in Small-Scale UV Systems
In the world of ultraviolet (UV) technology, precision is the difference between a successful process and a costly failure. Whether you are working with UV curing for 3D printing, sterilizing medical instruments, or conducting laboratory research, understanding how to measure UV irradiance is essential. While large industrial conveyors often have built-in monitoring systems, small-scale UV systems—such as benchtop curing chambers, handheld lamps, and compact LED arrays—require a more hands-on, tactical approach to measurement. This guide provides a comprehensive overview of how to accurately measure and manage UV irradiance in these specialized environments.
Understanding the Basics: What is UV Irradiance?
Before diving into the “how-to,” it is crucial to define exactly what we are measuring. In the context of UV light, two primary metrics are often discussed: irradiance and dose.
Irradiance (Intensity)
UV irradiance is the power of the UV light falling on a unit area of a surface. It is typically expressed in milliwatts per square centimeter (mW/cm²). Think of irradiance as the “brightness” or “intensity” of the UV source at a specific moment. In a small-scale system, irradiance determines how effectively the light can penetrate a coating or how quickly it can deactivate a pathogen.
UV Dose (Radiant Exposure)
UV dose, also known as fluence or radiant exposure, is the total energy delivered to a surface over a specific period. It is calculated by multiplying the irradiance by the exposure time. The unit of measurement is typically millijoules per square centimeter (mJ/cm²). If irradiance is the “speed” of the light, the dose is the “distance” traveled. For a process to be successful, both the intensity (to trigger the reaction) and the total energy (to complete the reaction) must be correct.
Why Measurement is Critical in Small-Scale Systems
Small-scale UV systems are often used in high-stakes environments where even a minor deviation in light output can lead to significant issues. Here is why measurement cannot be overlooked:
- Consistency in Curing: In UV curing applications, under-curing leads to tacky surfaces and poor structural integrity, while over-curing can cause brittleness or discoloration.
- Validation of Disinfection: For UV sterilization, a specific irradiance level must be maintained to ensure that bacteria and viruses are effectively neutralized. Without measurement, there is no proof of safety.
- Lamp Degradation: All UV sources, whether mercury vapor lamps or UV LEDs, degrade over time. Their output drops long before the bulb actually burns out. Regular measurement helps you identify when a lamp needs replacement before it ruins a production batch.
- Safety Compliance: Excessive UV leakage in a small workspace can be hazardous to operators. Measuring irradiance at the periphery of the system ensures a safe working environment.
The Components of a UV Measurement System
To measure UV irradiance effectively in a small-scale setup, you need the right tools. A standard measurement kit usually includes:
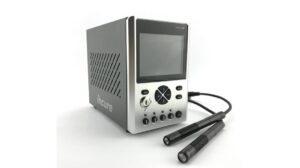
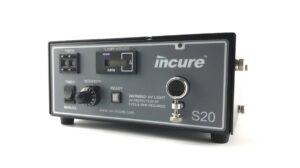
1. The Radiometer (UV Meter)
The radiometer is the core device that interprets the signals from the sensor and displays the irradiance values. Modern radiometers for small-scale systems are often handheld, battery-operated, and capable of storing data for later analysis.
2. The Sensor (Detector)
The sensor is the part that actually “sees” the UV light. It is vital to match the sensor to the spectrum of your light source. For example, a sensor designed for UVC (254 nm) disinfection will not provide accurate readings for a UVA (395 nm) LED curing lamp. High-quality sensors are filtered to respond only to specific wavelengths, ensuring that visible light or infrared heat does not skew the results.
3. Attenuators and Diffusers
In very high-intensity systems, the light might be too strong for the sensor to handle directly. Attenuators are used to reduce the light intensity to a measurable range, while diffusers ensure that light hitting the sensor from different angles is captured accurately (cosine correction).
Step-by-Step Guide to Measuring UV Irradiance
Measuring UV in a small-scale system requires a systematic approach to ensure repeatability. Follow these steps for the most accurate results:
Step 1: Identify the Target Area
Determine exactly where the UV light needs to be most effective. In a small curing chamber, this is usually the center of the baseplate. In a handheld application, it is the distance at which the operator typically holds the lamp from the substrate.
Step 2: Ensure Proper Sensor Orientation
The sensor should be placed exactly where the product or sample would be. It must be parallel to the UV source. Any tilt in the sensor can lead to a lower irradiance reading due to the “cosine effect,” where light hitting at an angle is reflected rather than absorbed by the detector.
Step 3: Account for Distance
UV irradiance follows the inverse square law—as the distance from the light source increases, the intensity drops significantly. Use a spacer or a fixed jig to ensure that every measurement is taken at the exact same distance. Even a few millimeters of difference can result in a 10-20% variance in irradiance readings.
Step 4: Warm Up the Lamp
Mercury vapor lamps require several minutes to reach full operating temperature and stable output. UV LEDs reach stability much faster but can still drift as they heat up. Always wait for the system to stabilize before taking your “official” measurement.
Step 5: Record Peak Irradiance and Total Dose
Most modern radiometers have a “Peak” mode. This is particularly useful for small-scale systems where you might be moving a handheld lamp over a surface. The radiometer will capture the highest intensity reached during the pass. If your system is stationary, record the steady-state irradiance after 30 seconds of exposure.
Common Challenges in Small-Scale UV Measurement
Small-scale systems present unique challenges that aren’t always found in large industrial lines. Being aware of these can help you avoid common pitfalls.
Spatial Uniformity
In a small chamber, the light intensity is rarely uniform across the entire floor. The center might have an irradiance of 50 mW/cm², while the corners only receive 20 mW/cm². When measuring, it is a best practice to perform a “map” of the area by taking readings at multiple points. This helps you understand the “sweet spot” of your system.
Reflections and Internal Geometry
Small UV boxes often have reflective interior walls (aluminum or stainless steel) to maximize efficiency. While this increases the dose, it can make irradiance measurements tricky because light is hitting the sensor from multiple angles. Ensure your sensor has a high-quality cosine-corrected diffuser to account for this scattered light.
Heat Management
Small, enclosed UV systems can generate significant heat. Excessive heat can cause the electronics in a UV sensor to drift or even fail. If you are measuring a high-heat system, keep the sensor exposure time to a minimum—just long enough to get a stable reading—and allow the sensor to cool down between measurements.
The Importance of Spectral Matching
One of the most common mistakes in UV measurement is using a meter calibrated for the wrong light source. UV light is categorized into different bands:
- UVA (315–400 nm): Used for curing and tanning.
- UVB (280–315 nm): Used for medical treatments and material testing.
- UVC (100–280 nm): Used for germicidal disinfection.
- UVV (400–450 nm): Visible UV, often used in specialized LED curing.
If you use a UVC radiometer to measure a 395 nm LED, the reading will likely be zero or extremely low, even if the light is blindingly bright. This is because the filters in the sensor are designed to block everything outside the UVC range. Always check the “spectral response” curve of your radiometer to ensure it aligns with the peak wavelength of your UV system.
Calibration: The Key to Long-Term Accuracy
A UV radiometer is a precision instrument that “drifts” over time. The optical filters and the detector itself can degrade when exposed to high-intensity UV light. To maintain the integrity of your process, you should follow these calibration guidelines:
- Annual Calibration: Most manufacturers recommend professional calibration at least once every 12 months. This involves comparing your device against a master standard traceable to national institutes like NIST.
- Cross-Validation: If you have multiple small-scale systems, use one “master” radiometer to periodically check the others. If you see a discrepancy, it’s time for service.
- Cleanliness: A fingerprint or a speck of dust on the sensor window can block 10% or more of the UV light. Clean the sensor window frequently using reagent-grade isopropyl alcohol and a lint-free cloth.
Selecting the Right Equipment for Your Small-Scale System
When shopping for a UV measurement solution for a small-scale environment, consider the following features:
Form Factor
For small chambers, you need a sensor that fits inside. Some radiometers have the sensor integrated into the handheld unit, while others use a “remote probe” connected by a cable. Remote probes are generally better for small-scale systems because you can place the sensor inside the chamber and read the display safely from the outside.
Data Logging
In R&D settings, you may want to see how the irradiance changes over time as the lamp warms up or as the system ages. Look for a meter that can export data to a computer via USB or Bluetooth.
Dynamic Range
Ensure the meter can handle both the lowest and highest intensities you expect. A meter designed for low-power germicidal lamps might “saturate” (max out) if placed under a high-power curing LED.
Best Practices for UV Safety during Measurement
Measuring UV light involves exposing yourself to the very radiation you are trying to quantify. Safety is paramount:
- Eye Protection: Always wear UV-rated safety glasses or a face shield. Standard clear glasses are not enough; they must be specifically rated to block the wavelengths you are working with.
- Skin Protection: Minimize skin exposure by wearing long sleeves and gloves. Even short bursts of high-intensity UV can cause “sunburn” or long-term skin damage.
- Shielding: Whenever possible, take measurements through a UV-blocking viewing window or use a remote probe so the system can be fully enclosed during the test.
Conclusion
Measuring UV irradiance in small-scale UV systems is not just a technical requirement; it is a fundamental part of quality control and process optimization. By understanding the difference between irradiance and dose, choosing the correctly calibrated equipment, and following a standardized measurement protocol, you can ensure that your UV application remains effective, efficient, and safe.
As UV technology continues to shift toward more compact LED-based systems, the need for precise, localized measurement will only grow. Whether you are validating a new medical sterilization protocol or fine-tuning a 3D printing resin, the data provided by an accurate UV radiometer is your most valuable asset. Don’t guess—measure. The success of your process depends on it.
Visit www.blazeasia.com for more information.